Discover a professional 3D printing powder supplier
Title: Dull Plastic to Dazzling Metal: Your 3D Publish Change Guide .
(how to make a 3d print look like brushed metal)
Key Product Key Phrase: Brushed Metal End Up.
1. Exactly what is a Brushed Steel Finish? .
Picture the smooth, great feel of stainless steel home appliances or a high-end light weight aluminum laptop computer. That distinct appearance isn’t perfectly smooth and shiny like chrome. Rather, it has fine, parallel lines stumbling upon its surface. This is the brushed metal finish. It’s created by literally brushing the metal surface with abrasive pads or belts, leaving behind those characteristic linear scrapes. The outcome is a surface area that catches light differently, offering an innovative, distinctive, and much less reflective appearance than polished steel. It really feels commercial yet improved, modern yet timeless. It’s that appearance that states top quality without screaming bling. For 3D prints, attaining this impact indicates relocating beyond the noticeable plastic appearance and including a layer of realistic look and perceived worth that basic filament colors just can’t match.
2. Why Inconvenience Making Plastic Appear Like Metal? .
Excellent inquiry. Why experience the initiative? The solutions are simple and effective. Initially, appearances. A brushed metal finish promptly elevates the appearance of your 3D print. It changes a potentially toy-like object right into something that shows up expert, sturdy, and pricey. Second, realistic look. Numerous functional parts, prototypes, cosplay props, or artistic sculptures need to simulate steel for believability. Assume robotic components, custom vehicle interior items, steampunk gadgets, or streamlined tech rooms. Plastic just will not cut it aesthetically. Third, viewed value. A component that appears like steel feels a lot more substantial and better, also if it’s lightweight plastic beneath. This is crucial for product designers, artists selling their work, or hobbyists wanting to impress. Lastly, it’s a great skill to master. Knowing this strategy opens doors to creating genuinely one-of-a-kind and professional-looking pieces without requiring pricey metal construction devices. It degrees up your ending up video game.
3. How to Really Obtain That Coveted Brushed Metal Look .
Ready to transform your print? The procedure involves preparation, painting, and texturing. Collect your supplies: sandpaper (different grits from rugged to penalty), guide spray paint, metallic spray paint (like silver, light weight aluminum, or gunmetal), clear matte or satin spray sealant, a soft fabric, and additionally, a very fine rough pad (like Scotch-Brite Ultra Fine). Step one: Fining sand is crucial. Start rough to remove layer lines and significant blemishes. Work your means down to great grits (like 400, after that 600+). Sand in regular, straight lines. This pre-texturing assists later on. Step 2: Tidy thoroughly. Remove all dust with a moist towel and allow dry entirely. Tip three: Use primer. Usage light, even layers. This assists the metal paint stick well and supplies a smooth base. Let it completely dry completely. Step four: The magic paint. Apply your metallic spray paint in slim, regulated coats. Stay clear of thick, soppy layers. Two or 3 light coats are far better than one thick one. Let each layer dry based on the canister’s directions. Tip five: Developing the “cleaned” impact. This is critical. As soon as the metallic paint is entirely dry (wait longer than you believe!), take your great unpleasant pad. Scrub the surface strongly however gently in one constant instructions just. Usage long, straight strokes. You’ll see the metal flakes line up, developing subtle scrapes that imitate genuine cleaning. Wipe away dirt frequently. Step 6: Seal it. Use a clear matte or satin sealant. This shields the coating and lowers shine, making it look extra like actual brushed steel, not repainted plastic. Matte is usually best for realistic look.
4. Where Can You Use This Remarkable Brushed Metal Finish? .
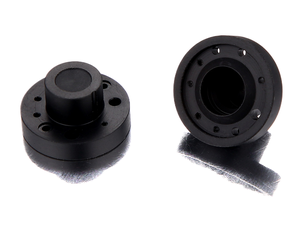
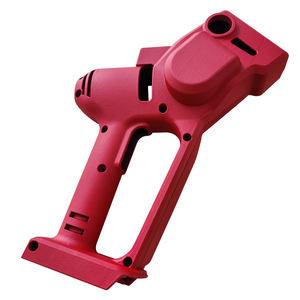
The applications are virtually countless! Think about functional components needing a professional look: personalized handles, bars, braces, or units for electronic devices projects. Cosplayers love this for armor pieces, tool props (guns, swords), safety helmets, or detailed device information– making foam or plastic appear like battle-worn steel or streamlined sci-fi alloy. Item designers use it for stunning models that showcase the intended last steel appearance without the expense. Artists integrate it into sculptures, attractive items, or lamp bases for a commercial posh vibe. Around your house, create special bookends, fashionable planters, advanced photo frames, or streamlined phone/tablet stands. Automotive enthusiasts utilize it for customized interior trim pieces. Enthusiasts improve version sets, RC automobile parts, or screen stands. Basically, any 3D print that gains from a touch of commercial beauty, realism, or perceived sturdiness is an ideal candidate. It transforms normal prints right into discussion beginners.
5. Brushed Steel Complete Frequently Asked Questions Answered .
Let’s deal with common concerns. Will not the paint remove? Correct prep (sanding and priming) is essential. A good sealer includes security. It won’t make it through continuous abrasion like actual steel, but for display screen or light usage, it holds up well. Can I utilize any metallic paint? Not preferably. Spray paints especially labeled “metal” job best. Regular silver paint looks level and phony. Avoid paints that are also glittery. Exactly how long lasting is the coating? Fairly resilient for decorative things or light handling. The sealant assists. It’s not as difficult as anodized light weight aluminum, however mindful usage keeps it looking fantastic. Prevent sharp impacts or heavy scraping. My print has great deals of information. Can I still do this? Yes, yet beware. Sanding intricate locations takes patience. Usage little items of sandpaper or unpleasant pads. Concentrate on bigger, flatter surfaces for the best brushed effect. Little details could disappoint the brushing as plainly. Shiny metal looks fake. What’s wrong? You possibly avoided the last brushing action with the rough pad. That action develops the necessary direct structure that diffuses light like genuine brushed metal. Likewise, a glossy sealant makes it look plasticky. Always use matte or satin sealant. How long does the whole process take? Perseverance is vital! Hurrying causes troubles. Allow sufficient drying time in between guide, paint, and sealer coats. Sanding requires time. Spending plan several hours, potentially over a day or 2, for best results. Do not rush the drying.
6. Repairing Common Problems .
(how to make a 3d print look like brushed metal)
Occasionally points don’t go completely. Paint looks blotchy or irregular: This typically suggests splashing as well close, too hefty, or on a moist day. Use light, also passes from regarding 8-12 inches away. Ideal problems are cozy and dry. Multiple thin coats repair this. Brush strokes look too deep or unequal: You utilized too coarse a rough pad or pushed too hard. Usage only an Ultra Penalty pad and apply regular, moderate pressure in one instructions. Practice on scrap initially. The surface really feels rough or gritty: This might be dirt trapped under the paint or insufficient sanding before paint. Clean carefully after fining sand and before each paint step. Guarantee your primer layer is smooth. Sealer made it gloomy: This usually occurs if the sealer is applied also heavily, in high humidity, or prior to the paint was totally treated. Use light coats of sealant in good problems. Ensure paint is entirely dry (inspect the can, commonly 24-hour or even more). The metal effect is weak: You might need an additional layer of metallic paint. Ensure you’re using a high quality metallic spray paint. The guide color can impact this as well; grey guide generally offers the truest metal appearance.