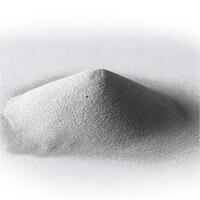
Discover a professional 3D printing powder supplier
Here is the rewritten title and blog post:
(can you machine 3d printed metal parts)
Unlock New Potential: Machining Your 3D Printed Metal Parts
So you’ve got some metal parts fresh off the printer. They look okay. They might even work okay. But deep down, you know they could be better. Smoother. Tighter. More precise. That’s where machining steps in. Think of it as giving your printed creations a professional finish. Let’s dive into why and how you can machine those 3D printed metal parts.
1. What is Machining for 3D Printed Metal Parts?
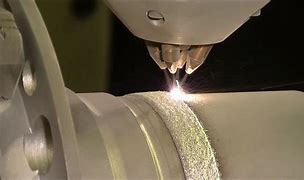
Machining is a subtractive process. It means removing material to shape a part. Think cutting, drilling, milling, turning. It uses tools like drills and cutters. This is different from 3D printing, which adds material layer by layer.
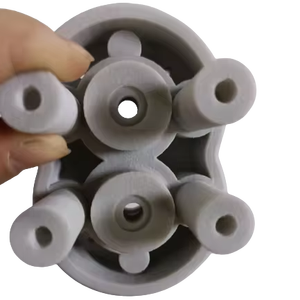
When we talk about machining 3D printed metal parts, we mean taking parts made by metal additive manufacturing and then using these subtractive techniques on them. The goal is to improve the part. We aim for better surface quality. We need more precise dimensions. We want tighter tolerances. Sometimes, we add features that are hard or impossible to print.
Why do this? Because 3D printed metal parts often need help. The surface might be rough. It could have visible layer lines. Dimensional accuracy might not be perfect. Critical features like holes or threads might need to be spot-on. Machining fixes these issues. It turns a good printed part into a great finished product.
2. Why Machine Your 3D Printed Metal Parts?
The reasons are clear. Let’s break them down.
First, surface finish. 3D printed parts often feel rough. They look unfinished. Machining smooths them out. It creates a polished, professional look. It also reduces friction. This is vital for parts that move or seal.
Second, dimensional accuracy. Printing is amazing, but it has limits. Parts can shrink or warp slightly during printing or cooling. Machining lets you hit exact sizes. You achieve the precise measurements you designed. This is crucial for parts that fit together.
Third, achieving tight tolerances. Printing might get you close, but machining gets you there. It allows for very precise control. Think bearings, shafts, mating surfaces. These need perfect fits. Machining delivers that precision.
Fourth, adding complex features. Some shapes are tricky to print. Think perfectly round holes, flat sealing surfaces, sharp internal corners. Printing might struggle. Machining these features after printing is often easier. It ensures they meet spec.
Finally, improving mechanical properties. A machined surface is usually stronger. It often has fewer microscopic defects than an as-printed surface. This can be important for parts under stress.
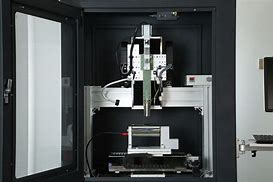
3. How Do You Machine 3D Printed Metal Parts?
It’s possible. It needs care. Here’s the general approach.
First, understand your printed material. Common printed metals include stainless steel, titanium, Inconel, aluminum alloys, and tool steels. Each machines differently. Some are easy. Some are very hard. Know your material’s properties.
Second, consider the part’s condition. As-printed parts might have internal stresses. They could be brittle near the surface. Sometimes, heat treatment is needed first. Annealing relieves stress. It makes the part easier to machine. It prevents cracking or distortion during cutting.
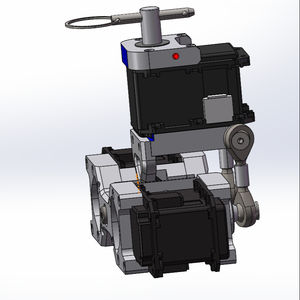
Third, secure the part properly. Fixturing is key. Printed parts can have complex, irregular shapes. Holding them steady without damaging them is critical. Custom jigs or soft jaws are often used. Vacuum chucks can help too. The part must not move during machining.
Fourth, choose the right tools and settings. Use sharp cutting tools. Carbide tools are common. Diamond-coated tools help with very hard materials. Use appropriate cutting speeds and feeds. Start conservatively. Printed metal might cut differently than solid stock. Coolant is often used. It keeps things cool. It washes away chips. It improves tool life and surface finish.
Fifth, plan your machining strategy. Identify which surfaces need work. Decide the sequence of operations. Start with areas needing the most removal. Save delicate features for last. Use light finishing passes for the best surface quality. Inspect the part during the process.
4. Applications: Where Does Machining 3D Printed Metal Shine?
This combination is powerful. It opens doors. Here are key areas.
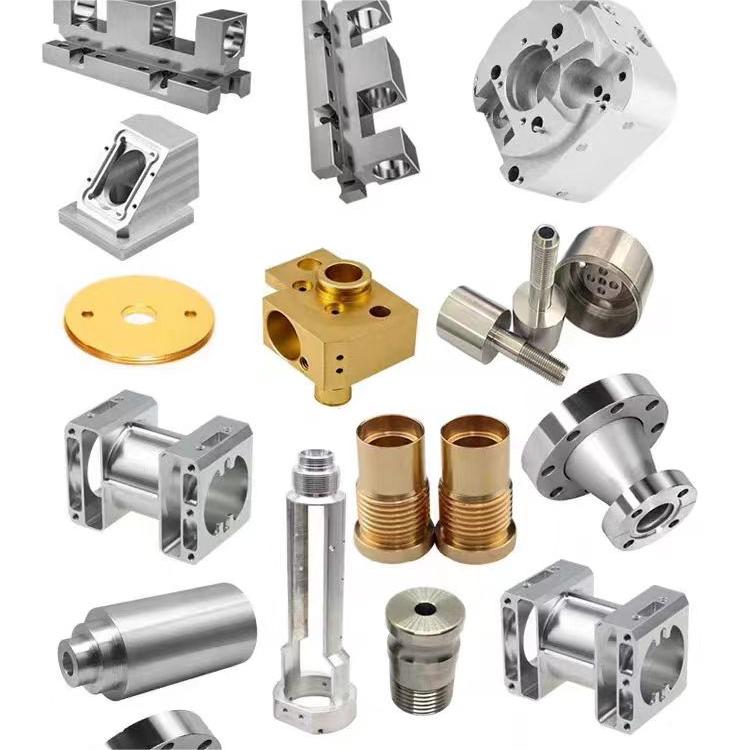
Aerospace and Defense: These industries demand perfection. Parts must be strong, light, and precise. Think turbine blades, fuel system components, structural brackets. Printing creates complex shapes. Machining ensures critical surfaces meet strict specs. It guarantees reliability.
Medical and Dental: Precision is everything here. Implants, surgical tools, dental crowns. They need biocompatible materials like titanium. Printing makes custom shapes. Machining creates smooth, non-irritating surfaces and exact fits. Patient safety depends on it.
Automotive and Racing: Performance parts need strength and accuracy. Engine components, custom brackets, transmission parts. Printing allows innovative designs. Machining ensures they handle high stress and heat. It makes parts durable under pressure.
Tooling and Molds: Injection molds, die-cast tools, jigs, fixtures. These often have complex cooling channels inside, printed for efficiency. The outer surfaces and mold faces need to be perfectly smooth and dimensionally accurate. Machining delivers this. It extends tool life.
High-Performance Engineering: Prototypes, research equipment, specialized machinery parts. Engineers push boundaries. They combine printing’s design freedom with machining’s precision. They get the best of both worlds. They create parts that were impossible before.
5. FAQs: Machining 3D Printed Metal Parts
People ask common questions. Here are answers.
Can you machine all types of 3D printed metal? Mostly yes. Common printed metals like stainless steel, titanium, aluminum alloys machine well. Very hard materials like Inconel or tool steel are tougher. They need special tools and slow speeds. Always check the specific alloy.
Doesn’t machining defeat the purpose of 3D printing? Not at all. Printing creates the complex shape efficiently. Machining only touches the critical surfaces. It adds minimal cost for big gains in quality and function. It’s a hybrid approach. You get complexity and precision.
Is it expensive? It adds cost, but often less than you think. Machining only specific areas keeps costs down. The value comes from getting a functional, precise part. For many applications, it’s essential. It avoids part failure.
How much material can you remove? It depends. You can remove a lot if needed. But usually, you only remove a little. Often just 0.1mm to 0.5mm (0.004″ to 0.020″) per surface. The goal is to clean up, not reshape the entire part.
(can you machine 3d printed metal parts)
What about support material? This is important. Remove all support structures before machining. They can interfere with clamping and cutting. They might break off during machining. This could damage the part or the tool. Clean the part thoroughly first.