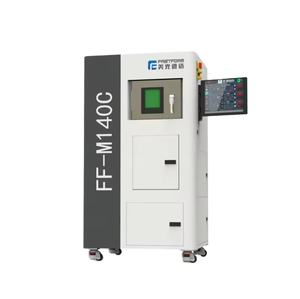
Discover a professional 3D printing powder supplier
Title: Steel Satisfies Plastic: The Trendy Method to Make Your 3D Prints Super Strong .

(how to 3d print parts that get metal inserts)
Key Product Keywords: 3D print components, steel inserts.
1. What Are 3D Publish Get Rid Of Metal Inserts? .
Think of your favored plastic gizmo. It functions fine. But often, you require a bolt to hold it together actually limited. Or maybe an area for a screw that obtains utilized repeatedly. Plastic alone isn’t always solid sufficient for that. That’s where metal inserts come in. We’re discussing small items of metal, like brass or steel. They have strings inside (like a small nut) or a smooth surface area. You put these metal little bits right into your 3D published plastic component. The plastic holds the metal piece snugly. The metal item provides you that incredibly strong point. It lets you screw things together securely without removing the plastic. It’s like giving your plastic development a little item of armor precisely where it needs it. Common ones are threaded inserts, heat-set inserts, press-fit bushings, and knurled nuts. The plastic part is printed initially. After that, the metal item is added.
2. Why Inconvenience Placing Metal Inserts right into Your Prints? .
Plastic is excellent for many points. It’s light. It can make complex forms conveniently. Yet metal is way more powerful for handling force in small locations. That’s the major reason. Placing a metal insert right into your 3D printed part gives you a super tough link point. You can screw bolts in and out often times. The metal strings won’t wear out like plastic threads might. It quits the plastic from splitting under pressure. It makes your whole layout extra dependable. Consider components that need setting up or disassembly. Think about parts that bring weight. Think of components that obtain resonances. Metal inserts make these feasible with plastic prints. They transform a possibly weak point into a strong one. They allow you make use of common screws and screws. This is often more affordable and easier than finding unique plastic bolts. It makes your printed parts act even more like points made in a manufacturing facility. Stronger, more resilient, a lot more specialist.
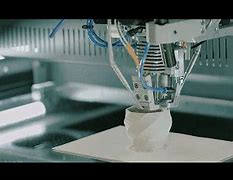
3. Just how Do You In Fact Placed Steel Inserts into 3D Prints? .
You published your component. Now you require to get the steel bit therein. The plastic opening requires to be simply the right dimension. It needs to be a tiny bit smaller sized than the insert. This creates a tight fit. There are a few main means individuals do this:.
Heat-Setting: This is extremely popular. You take a welding torch with a special suggestion shaped like the insert. You warm the insert with the iron. After that you gently push the warm insert right into the plastic hole. The warmth melts the plastic around the hole. The insert sinks in. The liquified plastic flows around the knurls or grooves on the insert. When it cools down, the plastic solidifies. The insert is secured location. It’s strong. You need the right temperature. As well hot burns the plastic. Also chilly does not thaw it enough. Go sluggish. Exercise on scrap prints initially.
Pushing In: Some inserts are developed to be pressed in chilly. These often have sharp barbs or knurls. You need an opening sized really precisely. Then you make use of an arbor press, a vise, or even a hammer (meticulously!) to push the insert in. The barbs dig into the plastic. This holds it. This method is quickly. But obtaining the hole dimension ideal is vital. Too loose and it befalls. As well tight and you split the part. Good for some styles, high-risk for others.
Ultrasonic Welding: This uses high-frequency audio resonances. It melts the plastic right where the insert touches it. It bonds them together. It’s extremely solid and rapid. However you require special, costly equipment. It prevails in manufacturing facilities, less so for home individuals.
Using Glue: Occasionally you simply adhesive the insert in. Utilize a solid epoxy designed for plastic and steel. Clean both surface areas well first. This functions. However it’s generally not as strong or reliable as heat-setting or pressing. It can be untidy. It’s even more of a backup strategy.
Despite the method, creating the opening right in your 3D design is step one. Make the opening a little undersized for the insert. Include a little lead-in chamfer at the top. This aids lead the insert in. Think about how the pressure will certainly be used when mounting the insert. Assistance the part well so it does not bend or break.
4. Where Can You Utilize These Strengthened 3D Printed Components? .
The usages are practically countless! Anytime you need a solid, multiple-use connection point in plastic, steel inserts are a game changer. Here are some great instances:.
Robotics & Drones: Arms, frames, motor mounts. These parts shake and take lots. Inserts allow you screw electric motors and links securely. They endure collisions better.
Personalized Enclosures & Boxes: Screw covers on and off repetitively. Mount circuit boards inside with standoffs screwed right into inserts. Make solid feet or placing factors.
Functional Models: Evaluate your layout like it’s the actual thing. Usage standard bolts. Construct and disassemble without wearing plastic strings.
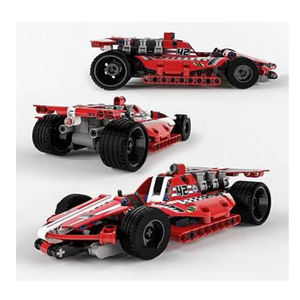
RC Cars & Planes: Touchdown equipment places, suspension arms, servo mounts. These take big effects. Inserts handle the anxiety where screws link.
Furnishings & Fixtures: Build custom-made jigs, tool owners, or even light furnishings. Inserts supply solid joints for bolts. They hold shelves or braces firmly.
Video Camera & Tech Gear: Customized places, tripod adapters, lens hoods. Inserts let you attach things firmly without harming the plastic.
Repair works: Repair broken items around your house. Include an insert to a fractured plastic housing to obtain a solid screw point once more. A lot more powerful than adhesive alone.
Leisure activity Projects: Version trains, cosplay armor, custom tools. Anywhere you require toughness and assembly. Inserts make your jobs tougher and more specialist.
5. FAQs Concerning Metal Inserts in 3D Prints .
What plastic works best? PLA is simple to heat-set but can soften if it fumes later on. PETG is harder and handles warm better, excellent for inserts. Abdominal and ASA are also outstanding choices. Nylon is incredibly difficult yet harder to print. Prevent really weak plastics.
Just how strong is it actually? An appropriately installed heat-set insert in PETG or ABS is extremely strong. The plastic around it will normally stop working prior to the insert takes out. It’s strong sufficient for many useful parts.
Will the insert melt the entire component? No. The warm is really regional. Only the plastic quickly touching the insert thaws. The remainder of the part remains amazing and strong. Make use of the appropriate temperature level on your iron.
What size opening do I require? This is important. Check the insert manufacturer’s specifications. Typically, it’s the insert’s external size minus a little bit (like 0.1 mm to 0.5 mm). Publish examination holes! Locate the dimension that gives a limited fit without fracturing the part when putting.
Can I use regular screws? Yes! That’s the entire factor. The insert has basic threads inside (like M3, M4, 4-40, 6-32). Usage bolts or screws that match the insert’s string dimension and kind.
Do I need a special welding torch pointer? It helps a whole lot. Tips formed like the insert (round, cone-shaped) transfer heat evenly. You can sometimes use a routine flat pointer, but it’s more challenging to regulate and might slide. Unique suggestions are cheap and worth it.
(how to 3d print parts that get metal inserts)
The insert rotates! What failed? Generally means the opening was also big, or not enough plastic thawed during heat-setting. It could likewise imply as well low a temperature or otherwise pressing in deep adequate. Make sure a limited initial fit and utilize adequate heat to thaw the plastic completely around the insert’s attributes.